


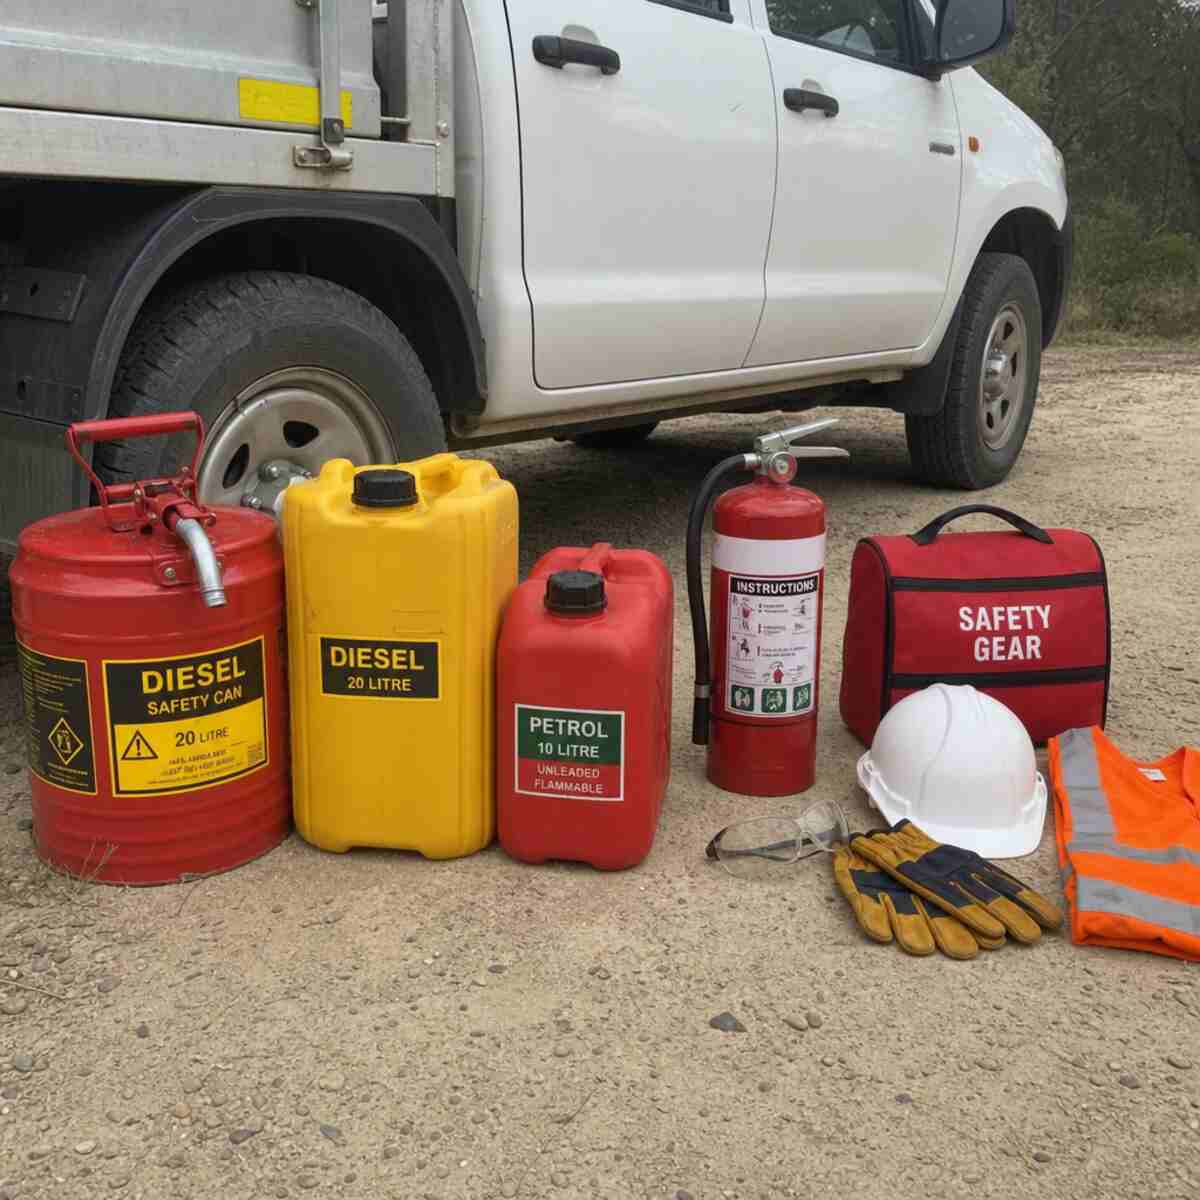
Draining a fuel tank is one of those jobs that looks simple until the details start raising their hand. Fuel is flammable. Vapors travel. Static electricity matters. Old hoses crack. Contaminated fuel can damage expensive components if it is handled carelessly. So the goal is not merely to get liquid out of a tank. The goal is to complete a safe, clean, controlled Fuel Tank Drain without creating a fire hazard, damaging the fuel system, or turning a small maintenance issue into a costly repair. What do you think about Fuel Tank Drain.
This guide walks you through the practical steps, safety checks, tool choices, and decision points involved in draining fuel from a vehicle, small engine, or similar fuel-powered equipment. If you have ever searched “how do you drain a fuel tank” and found either vague advice or risky shortcuts, consider this the cleaner path: careful preparation, approved containers, controlled transfer, responsible disposal, and a final inspection before the system is returned to use.
Fuel tank draining can be part of a broader fuel system service, especially when dealing with stale fuel, contamination, misfueling, repairs, or long-term storage. The exact layout varies by vehicle and equipment type, so always follow the manufacturer’s service information for your specific model. When in doubt, stop and call a qualified technician.
Draining a fuel tank is one of those jobs that looks simple until the details start raising their hand. Fuel is flammable. Vapors travel. Static electricity matters. Old hoses crack. Contaminated fuel can damage expensive components if it is handled carelessly. So the goal is not merely to get liquid out of a tank. The goal is to complete a safe, clean, controlled Fuel Tank Drain without creating a fire hazard, damaging the fuel system, or turning a small maintenance issue into a costly repair.
This guide walks you through the practical steps, safety checks, tool choices, and decision points involved in draining fuel from a vehicle, small engine, or similar fuel-powered equipment. If you have ever searched “how do you drain a fuel tank” and found either vague advice or risky shortcuts, consider this the cleaner path: careful preparation, approved containers, controlled transfer, responsible disposal, and a final inspection before the system is returned to use.
Fuel tank draining can be part of a broader fuel system service, especially when dealing with stale fuel, contamination, misfueling, repairs, or long-term storage. The exact layout varies by vehicle and equipment type, so always follow the manufacturer’s service information for your specific model. When in doubt, stop and call a qualified technician.
Table of Contents
Before You Begin: Know What Job You Are Actually Doing
A fuel tank drain procedure can mean several different things depending on the situation. The safest method depends on why the tank needs to be drained, what type of fuel is inside, and how the tank is built.
Common reasons to drain a fuel tank include:
- Stale fuel: Gasoline or diesel that has been sitting too long may cause hard starts, rough running, varnish buildup, clogged filters, or poor combustion.
- Wrong fuel added: Gasoline in a diesel tank, diesel in a gasoline tank, or contaminated fuel in any system should be handled before the engine is run.
- Water contamination: Water in fuel can cause corrosion, misfires, injector issues, and starting problems.
- Tank repair or replacement: A tank should usually be emptied before removal or major service.
- Fuel pump or sender access: Many fuel pump modules are located inside the tank, and lowering the fuel level can make service safer and cleaner.
- Long-term storage: Some equipment is stored dry, while other systems are stored with treated fuel. The correct approach depends on the machine and storage duration.
- Cleaning after debris or rust: Sediment in a tank can continue to clog filters until the source is addressed.
The first rule is simple: identify the reason before choosing the method. Draining a few gallons of stale fuel from a lawn tractor is not the same as draining a full automotive tank before a pump replacement. A professional fuel system service may be the better option when the tank is full, the fuel is contaminated, the vehicle is newer and more complex, or access is limited.
Safety First: Fuel Is Not Forgiving
Fuel draining deserves a serious safety mindset. Gasoline vapors can ignite even when liquid fuel seems contained. Diesel is less volatile than gasoline, but it is still combustible and still requires careful handling. Ethanol blends, small-engine fuel, and old fuel can all create hazards.
Before you touch the tank, set up the job properly.
Work in the right location
Choose a work area that is:
- Outdoors or extremely well ventilated
- Away from flames, pilot lights, heaters, welders, grinders, cigarettes, and sparks
- On a level surface
- Free from clutter and trip hazards
- Away from drains, soil, grass, and waterways
- Accessible enough to move containers without spilling
Never drain fuel in a basement, closed garage, or small enclosed room. Vapors can collect low to the ground and travel farther than people expect.
Wear appropriate protection
At minimum, use:
- Safety glasses or a face shield
- Fuel-resistant gloves
- Long sleeves that are not loose or dangling
- Closed-toe shoes
- Clothing you can wash immediately afterward
Avoid synthetic clothing that may generate static. Keep a fire extinguisher rated for flammable liquids nearby. Do not rely on water for a fuel fire.
Use only approved fuel containers
This is not the moment for buckets, drink bottles, storage totes, milk jugs, or random open pans. Use containers specifically approved for the type of fuel you are handling. They should seal securely, remain stable during transfer, and be clearly labeled.
A good fuel container setup includes:
- Enough capacity for the expected fuel volume
- Tight-fitting caps
- Clear labeling for gasoline, diesel, mixed fuel, or contaminated fuel
- No cracks, swelling, or damaged seams
- A safe place to stand upright during and after the job
If you are draining unknown or contaminated fuel, do not pour it into a container with clean usable fuel. Keep it separate until you know how it will be recycled or disposed of.
Eliminate ignition sources
Before draining begins:
- Turn off the engine and allow hot components to cool.
- Do not smoke or vape near the work area.
- Keep phones, chargers, extension cords, power tools, and battery chargers away from open fuel.
- Do not use incandescent work lights near fuel vapors.
- Avoid creating static discharge.
- Never use a shop vacuum to move fuel or vapors.
If a strong fuel smell builds up, stop. Ventilate the area and check for spills or leaks before continuing.
Tools and Supplies You May Need
The exact tools depend on the fuel tank design and the chosen drain method. Gather everything before opening the system, so you are not searching for supplies while fuel is exposed.
Useful items include:
- Approved fuel containers
- Manual fuel transfer pump or hand siphon pump rated for fuel
- Fuel-resistant hose
- Basic hand tools
- Wheel chocks
- Jack and jack stands if access is required under the vehicle
- Absorbent pads or fuel-safe spill material
- Drain pan approved for fuel, if applicable
- Rags for cleanup
- Labels or marker for containers
- Safety glasses or face shield
- Fuel-resistant gloves
- Fire extinguisher rated for flammable liquids
- Manufacturer service information for the vehicle or equipment
Avoid improvising with materials not rated for fuel. Some plastics soften, swell, or degrade when exposed to gasoline or diesel. That can create leaks, contamination, and unsafe handling conditions.
Choose the Safest Fuel Tank Drain Method
There is no single best method for every fuel tank. The right approach depends on access, fuel volume, tank design, and whether the fuel is clean or contaminated.
Method 1: Drain through a tank drain plug
Some tanks have a dedicated drain plug or service drain. If yours does, this may be the most direct route.
This method is best when:
- The manufacturer provides a drain point.
- The drain plug is accessible.
- The tank is not damaged or leaking.
- You can place an approved container safely beneath the drain area.
The challenge is control. Fuel can flow quickly once the plug is loosened, and containers must be changed without spills. On many modern vehicles, a drain plug may not exist.
Method 2: Use a manual siphon or transfer pump
A manual fuel-rated transfer pump is often the most practical method when the filler neck allows access. The pump moves fuel from the tank into approved containers without relying on mouth siphoning or unsafe suction.
This method is best when:
- The filler neck allows a hose to reach the fuel.
- Anti-siphon devices do not block access.
- The fuel level is high enough to pump effectively.
- The fuel is not heavily contaminated with sediment that could clog the hose.
Never start a siphon by mouth. Fuel ingestion and inhalation are serious hazards.
Method 3: Pump fuel through the vehicle’s fuel line
In some service situations, a technician may use the vehicle’s fuel pump circuit or service connections to transfer fuel through a fuel line. This can be effective, but it requires proper knowledge of the system.
This method may involve:
- Relieving fuel pressure
- Disconnecting a fuel line at a safe service point
- Directing fuel into an approved container
- Activating the fuel pump in a controlled way
- Avoiding dry-running or overheating the pump
Because modern fuel systems can be pressurized and electronically controlled, this method is often better left to professionals unless the service manual clearly explains the process and you have the correct tools.
Method 4: Remove the tank after reducing the fuel level
When the tank must be repaired, cleaned, or replaced, it may need to be removed. In most cases, the tank should be drained or reduced to as low a level as possible first.
This method is best when:
- The tank needs internal cleaning.
- The fuel pump module or sending unit requires service and cannot be accessed from above.
- The tank is damaged.
- Heavy contamination or debris remains after pumping.
A fuel tank, even with just a few gallons inside, can be awkward and heavy. A full tank can be dangerously unstable. Tank removal should be performed with proper lifting support and careful attention to hoses, electrical connectors, straps, shields, and filler-neck connections.
Step-by-Step Fuel Tank Drain Procedure
The following procedure is a general guide. Your vehicle or equipment may require a different sequence. Use the manufacturer’s service instructions whenever available.
Step 1: Confirm the fuel type and the reason for draining
Start by answering three questions:
- What fuel is in the tank?
- Why does it need to come out?
- Will the fuel be reused, recycled, or disposed of?
If the fuel is clean and fresh, it may be transferred into an approved container for later use in compatible equipment. If it is stale, mixed with the wrong fuel, watery, dirty, or of unknown quality, treat it as contaminated. Do not pour questionable fuel into another engine and hope for the best.
This is the moment to be honest. A small amount of bad fuel can create a large repair bill if it reaches injectors, pumps, carburetors, or emissions components.
Step 2: Reduce risk before opening the system
Park on a level surface. Turn the engine off. Let the vehicle or machine cool completely. Engage the parking brake if applicable, and use wheel chocks if the vehicle could move.
If you are working on a vehicle, consider disconnecting the negative battery cable before opening fuel lines or electrical connections near the tank. Follow the manufacturer’s procedure, especially on vehicles with memory settings, security systems, hybrids, or complex electronics.
Clean the area around the fuel cap, filler neck, access panel, or drain point. Dirt that falls into the system can create new problems.
Step 3: Relieve fuel system pressure if working with fuel lines
If your method involves opening a fuel line on a pressurized system, pressure must be relieved first. Many modern gasoline vehicles maintain fuel pressure after shutdown. Opening a pressurized line without preparation can cause fuel spray.
General ways systems may be depressurized include:
- Following the service manual procedure
- Removing a fuel pump fuse or relay and running the engine until it stalls
- Using a designated pressure relief valve where equipped
- Allowing adequate time for pressure to bleed down if the manufacturer allows it
Do not guess. Pressurized fuel can injure eyes and skin, and it can atomize into a more easily ignited mist.
If you are not sure how to safely relieve pressure, do not open the fuel line. Use a safer access method or hire a professional.
Step 4: Set up containers before fuel flows
Place approved containers where they will not tip. Keep caps nearby but out of the way. Use absorbent pads beneath connection points if appropriate. Plan how you will stop flow before the first container is full.
Important container habits:
- Fill containers only to their safe fill level.
- Leave expansion space.
- Cap each container promptly after filling.
- Label contaminated fuel clearly.
- Keep containers out of direct heat and away from ignition sources.
- Do not store fuel inside living spaces.
If the tank holds more fuel than your containers can safely accept, stop and get more approved containers before beginning. Improvising mid-drain is how spills happen.
Step 5: Access the fuel safely
Access depends on the tank design.
For a filler-neck siphon method:
- Remove the fuel cap.
- Insert the fuel-rated hose gently.
- Do not force the hose past resistance.
- Avoid damaging anti-siphon parts or filler neck components.
- Keep the receiving container lower than the tank if siphoning is used.
For a drain plug method:
- Confirm the plug is truly a fuel tank drain, not another component.
- Position the container before loosening the plug.
- Loosen slowly to control flow.
- Be ready to retighten if the container fills quickly.
For a fuel-line service method:
- Confirm pressure has been relieved.
- Use the correct disconnect tools if required.
- Direct the hose securely into a container.
- Avoid kinks and loose connections.
- Do not leave the transfer unattended.
For tank removal:
- Drain or pump out as much fuel as possible first.
- Support the tank properly.
- Disconnect filler hoses, vent lines, electrical connectors, and fuel lines according to service instructions.
- Lower the tank slowly and watch for missed connections.
Step 6: Transfer the fuel slowly and deliberately
Begin the Fuel Tank Drain with control, not speed. Fuel transfer should be steady, visible, and supervised.
If using a manual pump:
- Keep the hose end submerged in fuel when possible.
- Pump at a moderate pace.
- Watch the receiving container constantly.
- Stop before the container reaches its maximum safe fill level.
- Cap each container as soon as it is filled.
If using a drain plug:
- Control the plug carefully.
- Avoid placing your face or body directly under the drain point.
- Switch containers only after stopping or slowing flow.
- Reinstall the plug with the proper seal or gasket if required.
If using a vehicle pump method:
- Follow the service manual process.
- Do not let the pump run dry for extended periods.
- Monitor electrical connections and container level.
- Stop immediately if fuel leaks, sputters, or sprays from any connection.
Patience is part of the job. A few extra minutes can prevent a spill, fire risk, or damaged component.
Step 7: Handle the last portion of fuel carefully
Most drain methods leave some fuel behind. Tanks are shaped around frame rails, exhaust routing, fuel pump reservoirs, baffles, and pickup areas. The last amount may be difficult to remove without changing the tank angle or removing the tank.
If complete draining is necessary due to contamination, do not assume that “mostly empty” is sufficient. Water, sediment, and debris often settle at the lowest points, meaning the final portion may be the dirtiest.
To remove remaining fuel safely, you may need to:
- Use a smaller fuel-rated hose.
- Access the tank through the pump module opening, if the system allows.
- Remove the tank for cleaning.
- Have a professional shop evacuate and clean it.
Do not tilt a vehicle in an unsafe way to chase the last cup of fuel. Stability matters more than perfection.
Step 8: Inspect the fuel you removed
A fuel tank drain gives you a valuable diagnostic opportunity. Look at the removed fuel before deciding what to do next.
Signs of trouble include:
- Water separation at the bottom of the container
- Rust flakes
- Black particles
- Cloudiness
- Sour, varnish-like odor
- Unusual color
- Gel-like material
- Metal particles
- Dirt or organic debris
If fuel contamination is present, the tank may not be the only concern. Filters, lines, pump strainers, injectors, carburetor bowls, and rails may also need attention. In that case, the job becomes a broader fuel system service rather than a simple drain.
Step 9: Inspect the tank and related components
Once the tank is empty or nearly empty, inspect what you can safely access.
Check for:
- Leaks around seams
- Cracked filler neck hoses
- Loose clamps
- Damaged vent hoses
- Rust or corrosion
- Dented tank areas
- Worn straps or supports
- Damaged electrical connectors
- Brittle fuel lines
- A clogged or dirty fuel pump strainer if accessible
Do not ignore fuel odor after reassembly. A faint smell during service is expected, but persistent odor may signal a leak, poor seal, loose cap, damaged vapor line, or spill that has not fully evaporated.
Step 10: Clean up spills immediately
Small spills should be handled right away. Use absorbent pads or fuel-safe spill material. Keep used materials in a safe, well-ventilated location away from ignition sources until they can be disposed of in accordance with local regulations.
Do not wash fuel into storm drains, soil, gravel, or household plumbing. Do not leave soaked rags in a pile. Do not toss fuel-soaked material into ordinary trash unless local rules allow it and the material is fully handled as required.
If a large spill occurs, stop work, eliminate ignition sources, keep people away, and follow local emergency guidance.
Step 11: Reassemble the system correctly
Before adding fuel back, make sure everything is properly secured.
Confirm that:
- Drain plugs are tightened correctly.
- Fuel lines are fully seated.
- Quick-connect fittings are locked.
- Hose clamps are positioned properly.
- Filler neck hoses are not twisted or cracked.
- Electrical connectors are reattached.
- Tank straps or mounts are secure.
- Access covers are reinstalled.
- Fuel cap seals properly.
If any seal, gasket, hose, or clamp looks questionable, replace it with the correct part. Fuel systems are not a good place for “good enough.”
Step 12: Add fresh fuel and prime the system
If the fuel was drained because it was stale, contaminated, or incorrect, refill with fresh fuel of the correct type. Add only enough at first to test the system unless the service procedure calls for more.
Many fuel-injected vehicles need the system primed before starting. This may happen automatically when the key or start button is cycled, but procedures vary. Small engines and carbureted systems may require a different approach.
General startup checks include:
- Turn the key to the on position without starting if the system uses an electric pump.
- Listen for the pump to run briefly if applicable.
- Check for leaks before cranking.
- Start the engine only when the area is clear and containers are sealed.
- Let the engine idle while you inspect for leaks and abnormal smells.
- Shut the engine off immediately if fuel leaks or spraying occurs.
Do not keep cranking an engine that will not start. If the system was opened, air may need to purge, a connection may be loose, or additional diagnostics may be needed.
Special Situation: Draining the Wrong Fuel
Misfueling needs fast, careful action. If the wrong fuel has been added, the safest move is usually to avoid starting the engine. Running the engine can circulate the wrong fuel through pumps, filters, rails, injectors, and combustion chambers.
If the engine has not been started:
- Do not turn the key or start button unnecessarily.
- Arrange for the tank to be drained.
- Keep the wrong fuel separate for proper disposal.
- Refill with the correct fuel.
- Prime and test the system carefully.
If the engine has been started or driven:
- Stop as soon as it is safe.
- Do not continue driving to “burn it off.”
- Have the system inspected.
- Expect that filters, lines, or other components may need service.
This is one of the clearest cases where professional fuel system service is often worth the cost. The longer wrong fuel circulates, the more expensive the repair can become.
Special Situation: Draining Stale Fuel
Stale fuel is common in seasonal equipment, stored vehicles, boats, motorcycles, generators, and classic cars. Over time, fuel can oxidize, lose volatility, absorb moisture, or leave deposits.
Signs that fuel may be stale include:
- Hard starting
- Rough idle
- Surging
- Poor throttle response
- Stalling
- Gum or varnish odor
- Discolored fuel
- Clogged filters
If the fuel is only slightly old and the manufacturer allows treatment, a fuel stabilizer or dilution with fresh fuel may sometimes help. But if fuel smells sour, looks dark, contains water, or has been stored for a long time, draining is usually smarter than trying to force it through the engine.
After draining stale fuel, consider replacing the fuel filter if the system has one. On carbureted equipment, the carburetor bowl may also contain old fuel that needs to be removed. On fuel-injected systems, additional diagnostics may be needed if the stale fuel has already circulated.
Special Situation: Water in the Fuel Tank
Water contamination is not always obvious at first. Because water is heavier than gasoline or diesel, it tends to settle at the bottom of the tank. That means it may be collected near the pickup area and pulled into the system.
Possible symptoms include:
- No-start condition
- Misfires
- Stalling shortly after startup
- Hesitation
- Corrosion inside the tank
- Repeated fuel filter clogging
- Poor performance after refueling
If water is suspected, simply adding fresh fuel may not solve the problem. The water must be removed, and the source should be identified. Possible causes include contaminated fuel, a loose fuel cap, condensation during storage, or damaged venting components.
When water contamination is significant, the tank may need to be drained fully and inspected. Filters may need replacement. In some systems, injectors, pumps, or carburetors may need additional cleaning or repair.
Special Situation: Diesel Fuel Tank Draining
Draining a diesel fuel tank has its own concerns. Diesel is less volatile than gasoline, but cleanliness is extremely important. Modern diesel fuel systems can be sensitive to water, dirt, and incorrect fuel.
When working with diesel:
- Keep containers clean and sealed.
- Avoid introducing dirt into the tank.
- Watch for water separation.
- Replace water-separating filters when needed.
- Follow priming procedures carefully after service.
Air trapped in diesel fuel systems can create starting problems. Some systems are self-priming, while others require specific bleeding or priming steps. Do not crank excessively. If the engine does not start after proper priming, stop and troubleshoot.
Special Situation: Small Engines and Outdoor Equipment
Small engines often have simpler fuel systems, but they are not risk-free. Lawn mowers, generators, pressure washers, snow blowers, chainsaws, and similar equipment may have small tanks, gravity-fed lines, carburetors, and compact spaces.
A typical small-engine drain may involve:
- Running the engine only if the fuel is known to be safe and the manufacturer recommends it
- Using a manual pump through the filler opening
- Draining the carburetor bowl where equipped
- Disconnecting a low fuel line if accessible and safe
- Refilling with fresh fuel
- Checking for leaks before storage or use
For mixed two-stroke fuel, clearly label the drained fuel. Do not mix it with straight gasoline unless you know exactly what it is and where it can be used safely.
What Not to Do When Draining a Fuel Tank
A safe Fuel Tank Drain is as much about avoiding bad ideas as it is about following good steps.
Do not:
- Start a siphon by mouth.
- Use a shop vacuum to extract fuel.
- Drain fuel near a water heater, furnace, dryer, or pilot light.
- Use open buckets or non-approved containers.
- Store fuel in unlabeled containers.
- Mix contaminated fuel with clean fuel.
- Pour fuel down a drain, onto soil, or into regular trash.
- Cut fuel lines unless replacement is part of the repair.
- Force hoses past anti-siphon devices.
- Use power tools that may spark near exposed fuel.
- Leave draining fuel unattended.
- Assume the tank is vapor-free just because it is empty.
Empty fuel tanks can still contain explosive vapors. Treat an empty tank with the same respect as a full one.
How to Dispose of Drained Fuel Properly
Disposal rules vary by location, so stay generic until you confirm local requirements. In many areas, contaminated gasoline, diesel, and mixed fuel must be taken to an approved hazardous waste facility, recycling center, automotive service facility, or municipal collection event.
Good disposal habits include:
- Keep fuel in approved, sealed containers.
- Label containers clearly.
- Separate gasoline, diesel, mixed fuel, and unknown fuel.
- Do not transport leaking containers.
- Keep containers upright during transport.
- Avoid leaving fuel in a hot vehicle.
- Call ahead before taking fuel to a facility.
Clean, fresh fuel may be reusable in compatible equipment, but only if you are certain it is not contaminated. If there is any doubt, treat it as waste.
After the Drain: Complete the Fuel System Service
A drained tank is only part of the story. If the original problem was contamination, stale fuel, or poor running, the rest of the fuel system may need attention.
Consider these follow-up steps:
- Replace the fuel filter if serviceable.
- Inspect the fuel pump strainer if accessible.
- Check lines for cracks, swelling, or leaks.
- Inspect the filler neck and cap seal.
- Clean or service the carburetor if equipped.
- Check for diagnostic codes on modern vehicles.
- Verify fuel pressure if performance issues remain.
- Use fresh fuel from a reliable source.
- Monitor the engine during the first drive or operating session.
A thoughtful fuel system service prevents repeat problems. Draining dirty fuel but leaving a clogged filter in place is like mopping the floor while the sink is still overflowing.
Troubleshooting After a Fuel Tank Drain
Even when you do everything carefully, issues can appear after reassembly. Use the symptoms to narrow the cause.
The engine cranks but will not start
Possible causes include:
- Fuel system not primed
- Air trapped in the lines
- Fuel pump not connected
- Fuel pump fuse or relay not reinstalled
- Empty tank or too little fuel added
- Line connection not fully seated
- Wrong fuel still present in the system
- Clogged filter or pickup screen
Start with the basics. Confirm fuel level, electrical connections, fuses, relays, and priming procedure before assuming a major failure.
The engine starts, then stalls
Possible causes include:
- Remaining contaminated fuel in the lines
- Water reaching the engine
- Restricted fuel filter
- Air entering through a loose connection
- Weak fuel pump
- Carburetor bowl still containing old fuel
If the fuel was contaminated, replace filters and inspect downstream components as needed.
There is a strong fuel smell
Possible causes include:
- Loose fuel cap
- Spill that has not evaporated
- Leaking line connection
- Damaged filler neck hose
- Loose clamp
- Faulty seal around a fuel pump module or sender
- Vent line issue
Do not drive or operate equipment with a persistent fuel smell until the source is found.
Fuel leaks after reassembly
Stop immediately. Shut off the engine, move away from ignition sources, and inspect only when it is safe.
Common leak points include:
- Drain plug seal
- Fuel line quick-connect fitting
- Hose clamp
- Fuel pump module seal
- Cracked rubber hose
- Damaged plastic fitting
- Rusted metal line
Replace damaged parts with properly rated fuel components. Do not patch high-risk fuel leaks with tape, glue, or improvised sealants.
How Do You Drain a Fuel Tank Without Making a Mess?
The practical answer to “how do you drain a fuel tank” is: prepare more than you think you need to, move slower than you want to, and keep the fuel contained from the first drop to final disposal.
A clean drain depends on five habits:
- Use the right containers. Fuel belongs in approved containers, not open pans or makeshift jugs.
- Control the flow. A hand pump or service drain gives you more control than rushing.
- Watch the container level. Do not turn away while fuel is flowing.
- Cap and label immediately. Every filled container should be sealed and identified.
- Clean as you go. Small drips become big odors if ignored.
Professional technicians are not cleaner because fuel magically behaves better for them. They are cleaner because they prepare the workspace, use the right transfer equipment, and avoid improvising under pressure.
When to Call a Professional
Some fuel tank drain jobs are reasonable for a careful, well-equipped person. Others should go directly to a shop.
Call a professional if:
- The tank is full and difficult to access.
- The vehicle has a complex pressurized fuel system.
- The wrong fuel was added and the engine was run.
- Fuel is leaking.
- You smell fuel but cannot find the source.
- The tank must be removed and you do not have proper lifting equipment.
- The fuel is heavily contaminated.
- The vehicle is diesel and requires specialized priming.
- You do not have approved containers or a safe work area.
- You feel unsure at any point.
There is no shame in handing off a hazardous job. Good judgment is part of good maintenance.
A Practical Fuel Tank Drain Checklist
Use this checklist before, during, and after the procedure.
Before draining:
- Confirm the fuel type and reason for draining.
- Read the service information for your vehicle or equipment.
- Choose the safest access method.
- Move to a ventilated area away from ignition sources.
- Gather approved fuel containers.
- Put on gloves and eye protection.
- Keep a suitable fire extinguisher nearby.
- Let hot components cool.
- Relieve fuel pressure if opening a pressurized line.
- Plan disposal before fuel is removed.
During draining:
- Keep containers stable and upright.
- Transfer fuel slowly.
- Watch for spills, leaks, and vapor buildup.
- Stop before containers are overfilled.
- Cap each container promptly.
- Keep contaminated fuel separate.
- Never leave the process unattended.
After draining:
- Inspect the drained fuel.
- Check the tank, hoses, lines, clamps, and seals.
- Replace damaged or questionable parts.
- Reassemble all connections carefully.
- Add fresh fuel of the correct type.
- Prime the system as required.
- Check for leaks before and after startup.
- Dispose of old fuel responsibly.
Common Questions About Fuel Tank Drain Procedures
Can I drain a fuel tank by removing the fuel cap and inverting the vehicle?
No. That is unsafe and unrealistic for vehicles, and it can be dangerous even with small equipment. Use a controlled drain method such as a fuel-rated manual pump, designated drain point, or manufacturer-approved service procedure.
Can I use a garden hose as a siphon hose?
No. Use hose rated for fuel. Ordinary hose may degrade, contaminate the fuel, leak, or become unsafe when exposed to gasoline or diesel.
Is it safe to reuse drained fuel?
Only if the fuel is clean, fresh, correctly identified, and stored in an approved container. If fuel is stale, watery, dirty, mixed, or unknown, do not reuse it in an engine you care about.
How empty does the tank need to be?
That depends on the reason for draining. If you are lowering a tank for service, reducing weight may be enough. If you are dealing with water, wrong fuel, or debris, the tank may need to be emptied and cleaned more thoroughly.
Why does my vehicle still smell of fuel after draining it?
Possible causes include spilled fuel, a loose cap, a leaking connection, a damaged filler hose, a vent issue, or a seal that did not seat correctly. Do not ignore a persistent odor.
Can I drain fuel into a regular drain pan?
Only use containers or pans approved for fuel, and promptly transfer fuel into approved sealed containers. Open containers increase vapor risk and spill risk.
Do I need to replace the fuel filter after draining the tank?
If the fuel was stale, dirty, watery, or incorrect, replacing a serviceable fuel filter is often wise. If the filter is built into a module or not separately serviceable, follow manufacturer guidance.
Is a Fuel Tank Drain the same as cleaning the fuel tank?
No. Draining removes fuel. Cleaning removes residue, sediment, water, varnish, rust, or debris. A contaminated tank may require both draining and cleaning.
Pro-Level Tips for a Cleaner, Safer Job
A few habits can make the difference between a controlled service and a frustrating mess.
Label everything before you forget
Once several containers are filled, it is easy to lose track. Label them as soon as possible:
- Fresh gasoline
- Old gasoline
- Diesel
- Mixed two-stroke fuel
- Water-contaminated fuel
- Unknown fuel
Clear labels protect you, the next person who handles the container, and any equipment that might otherwise receive the wrong fuel.
Keep the hose end under control
A hose can jump, curl, or slip out of a container. Secure it by hand or with a safe support while keeping constant supervision. Do not wedge it carelessly and walk away.
Work with gravity, not against it
When using a siphon method, the receiving container generally needs to be lower than the fuel level in the tank. If that is not possible, a hand pump may be necessary.
Keep the job small when possible
If the tank is nearly full, consider whether a professional evacuation setup would be safer. Multiple container changes increase spill risk. Full tanks are also heavy to remove.
Replace old rubber parts while access is easy
If the filler hose, vent hose, or clamps are aged and accessible during the procedure, replacing them may prevent future leaks. Use correct fuel-rated parts.
Respect vapor even after the liquid is gone
An empty tank can still be dangerous because vapors remain. Do not weld, grind, cut, or apply heat on or near a fuel tank unless it has been professionally prepared for that work.
The Bottom Line
A fuel tank drain procedure is not complicated in theory: open a safe path, transfer fuel into approved containers, inspect the system, reassemble correctly, and dispose of fuel responsibly. In practice, the details matter. The safest approach is methodical, well-ventilated, properly equipped, and free from shortcuts.
If the job is part of routine maintenance, take your time and use the right equipment. If the fuel is contaminated, the tank is hard to access, or the wrong fuel has circulated through the engine, treat it as a complete fuel system service and seek professional help when needed.
The cleanest answer to “how do you drain a fuel tank” is not a trick or a hack. It is disciplined preparation, careful transfer, and respect for the hazards involved. Do that, and you give the engine what it needs most: a safe fuel supply, a clean path forward, and a much better chance of running the way it should.
